

 Share on media
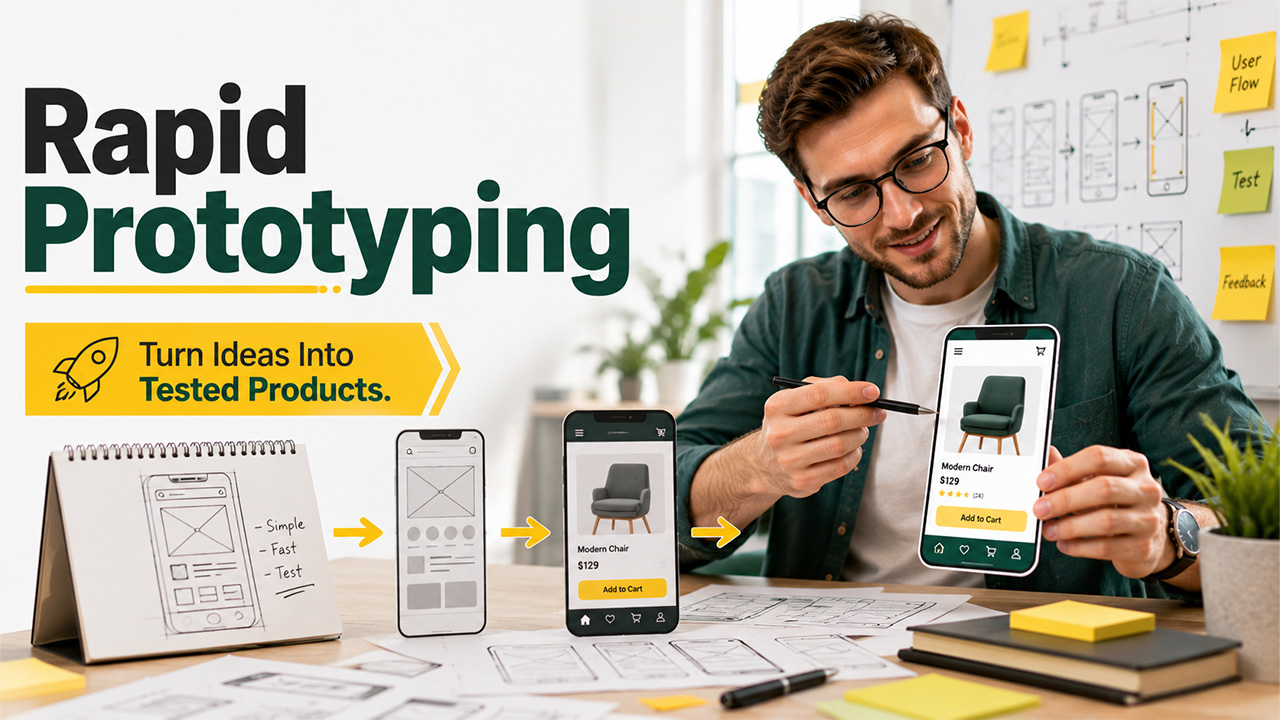


Every great product starts as a rough idea, and the fastest way to test whether that idea actually works is through rapid prototyping. Instead of spending months building something polished before anyone’s even tried it, teams build a quick, testable version first, then learn from real feedback before committing serious time and money.
It’s a mindset shift as much as a process. It’s no longer about making assumptions about what users need, but about putting something in front of them, seeing how they respond, and changing course before investing too much time and effort in the wrong direction.
In this blog, we’ll break down what rapid prototyping actually involves, the different types you’ll encounter, and the step-by-step process teams use to quickly move from idea to a tested concept.
What Is Rapid Prototyping?
Rapid Prototyping refers to the quick creation of a workable model, referred to as a prototype, of the product or the design, to test and improve it before moving on to the development phase. Rapid prototyping emphasizes the quickness of the process, learning through testing, and not perfection.
It was developed in manufacturing and industrial design as a way of building a physical prototype of something before it can be put into manufacture. Rapid prototyping has now become widely used in software development and UX/UI design processes.
The key difference between rapid prototyping and building the actual thing is the reason for doing it. A prototype exists to answer a question: does this work, does this make sense, do people want this, not to be the final product itself.
Why Rapid Prototyping Matters
The importance of rapid prototyping lies in the ability to discover issues early when they are cheap to fix, rather than late when they are costly.
- Reduces wasted effort: Prototype testing of an idea ensures you are not spending many months developing something that may not work.
- Surfaces real user feedback early: Seeing a person using your idea in the form of a rough prototype uncovers problems that could never be discovered through discussions in the conference room.
- Speed up decision-making: Multiple alternatives can be assessed quickly instead of spending time on hypothetical arguments during meetings.
- Improves stakeholder buy-in: An actual prototype is much easier to get excited about and much easier to approve of than a written idea.
- Lowers the cost of failure: The failure of an idea is known after a couple of days of prototype development, not many months.
None of this means rushing recklessly; it means being deliberate about what needs testing early, so the final build is shaped by real evidence rather than assumptions.
Types of Prototypes
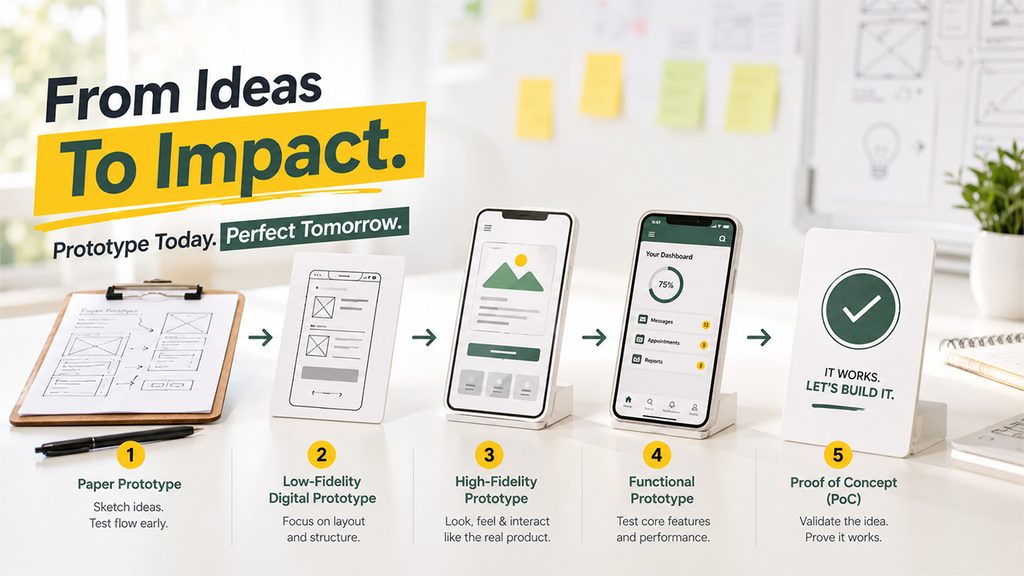
Not every prototype requires the same amount of detail. The decision on which one should be used should depend solely on what you want to learn from them.
Paper Prototype
This involves creating sketches of the screens on actual paper or on a whiteboard before any kind of software is used. This is the quickest and most economical way of testing the flow and structure. In fact, the most productive discussions can take place during this phase because nobody is concerned about changes that may take place.
Low-Fidelity Digital Prototypes
If the initial concept stands its ground, then the team proceeds to develop prototypes that include simple wireframes created in applications such as Figma. The main emphasis here is on layout and functionality of buttons and navigation, not on colouring and fonts yet. It is still easy to make any changes at this stage.
High-Fidelity Prototypes
This is where everything begins to look like the actual product. High-fidelity prototypes involve actual styling and interaction with some real data involved and are almost as good as the final product, such that the user doesn’t even realize that they are testing something unfinished. This level is employed when you have to test how something feels.
Functional Prototypes
Rather than focusing on how something looks, a functional prototype will put the technical capabilities of the main feature to the test. This applies more when the risk in question does not deal with anything relating to appearance but with feasibility itself.
Proof of Concept (PoC)
In the proof of concept, it’s all about the basics: Can this even work from a technical standpoint? At this stage, there is no consideration of aesthetics whatsoever; the only thing that matters is if the actual mechanism for the concept itself even works.
Most teams move through these in order, starting rough and cheap, then increasing fidelity only once the earlier, faster tests have validated the direction.
The Rapid Prototyping Process, Step by Step
Though the exact process may change slightly depending on the individual team, the typical process that goes into any rapid prototyping is quite similar:
Step 1: Define the problem: Understand clearly the problem that the prototype should be solving first.
Step 2: Sketch initial ideas: Create a couple of possible solutions to the problem using sketches on paper or a whiteboard.
Step 3: Build a low-fidelity prototype: Choose the best sketch and create a prototype that works without the need for high-fidelity graphics.
Step 4: Test with real users: See how your prototype works on real users, not just your teammates.
Step 5: Gather and analyze feedback: Understand where people have problems while interacting with your prototype; don’t look at isolated instances.
Step 6: Refine and increase fidelity: Revise your prototype based on the feedback and proceed to a higher-fidelity prototype if necessary.
Step 7: Repeat as needed: Usually, prototyping is an iterative process; most prototypes require multiple revisions before becoming good enough for development.
The whole point of this loop is speed. Each cycle should take days, not months, so the team can fail fast, learn fast, and move forward with actual evidence instead of guesswork.\
Tools Commonly Used for Rapid Prototyping
The choice of a tool largely depends on your stage of development and your objective:
- Figma: A go-to tool when you need to make wireframes and interactive prototypes, along with real-time collaboration features for remote teamwork.
- Sketch: One of the oldest design tools, widely used by UI designers when creating prototypes, especially on Mac.
- InVision: A great tool to create clickable prototypes out of static designs without any coding skills.
- Adobe XD: A combination of designing and prototyping tools suitable for teams that work in Adobe products.
- Marvel: A simpler, more beginner-friendly option for quick, low-fidelity prototypes.
Increasingly, teams are also leaning on AI to speed up the earliest stages entirely. Platforms offering AI-powered website design and content automation can generate a working layout or draft site structure in minutes, giving teams a starting prototype to react to and refine, rather than building the first version completely from scratch.
Common Mistakes to Avoid
Even with the right intentions, a few missteps can quietly undermine the whole point of prototyping:
- Over-polishing too early: Spending time on colours and fonts before the core flow is validated wastes effort on details that might change entirely.
- Skipping real user testing: Only testing with your own team means missing the confusion or friction actual users would immediately notice.
- Getting attached to the first idea: Prototyping only works if you’re genuinely open to scrapping a direction that isn’t landing.
- Ignoring mobile and responsive behaviour: A prototype that only gets tested on desktop can miss major issues once it’s actually viewed on a phone, and it’s worth checking guidance on how to make a website mobile-friendly early rather than discovering problems after launch.
- Treating prototyping as a one-time step: Skipping repeated rounds of testing and refinement defeats the purpose of the whole process.
Avoiding these is less about doing more work; it’s about staying disciplined around the actual goal, learning fast, and not building something impressive too soon.
Conclusion
Ultimately, rapid prototyping is not about taking shortcuts; it is about testing to find out what works and not waste months creating something that is ultimately the wrong solution for the problem in question. It is not about the team having the best tools but being able to prototype, test, adapt, and evolve the design based on the feedback instead of relying on hypotheses.
The key thing in any form of rapid prototyping is moving fast and learning fast, whether you are sketching the initial prototype on paper, creating a clickable prototype in Figma, or planning the user experience for eCommerce Development. This approach helps teams test ideas early, gather feedback, and determine which product direction is both visually appealing and practical for users.
Go fast and let each stage define the following one. This is basically the key principle of good rapid prototyping.
Frequently Asked Questions
What’s the difference between rapid prototyping and a regular prototype?
Rapid prototyping emphasizes speed and quick iteration over polish, aiming to test ideas fast and cheap. A regular prototype might take longer to build and often skips the repeated testing cycles that make rapid prototyping genuinely effective for early validation.
How long should a rapid prototype take to build?
It varies according to the level of fidelity; however, low-fidelity prototypes must take either a few hours or a couple of days. A rapid prototype that takes weeks to develop generally is an indication that it has lost track of its intended purpose.
Do I need coding skills for rapid prototyping?
Not necessarily. Tools like Figma, Sketch, and Invision are some tools that help you create clickable prototypes without writing any line of code. This makes rapid prototyping easier even for people who don’t have any programming knowledge.
Can rapid prototyping be used outside of software design?
Yes, it has its roots in manufacturing and industrial design. In any area where it is important to test out an idea fast before investing significant time or materials, it makes sense to do so.
What’s the biggest mistake teams make with rapid prototyping?
Over-polishing too early. Spending time perfecting visuals before the core idea is validated wastes effort on details that might change completely once real user feedback comes in during testing.\