 Share on media
In the current digital age, WordPress is still the primary option for everyone, including business owners, web developers, bloggers, and entrepreneurs—thanks to its flexible, powerful, and highly customizable interface and features. However, the WordPress Setup process can feel overwhelming, especially for beginners. Don’t worry—this blog will guide you through this.
This blog is designed in the simplest and most practical way possible to explain every crucial step to setting up WordPress. This includes clear, step-by-step instructions embedded with actual screenshots (attached with each step) to simplify the installation process. Whether you’re an experienced developer or a non-IT professional, anyone can set up WordPress with zero technical knowledge.
You don’t need to be a tech expert to get started.
Step 1: Install WordPress
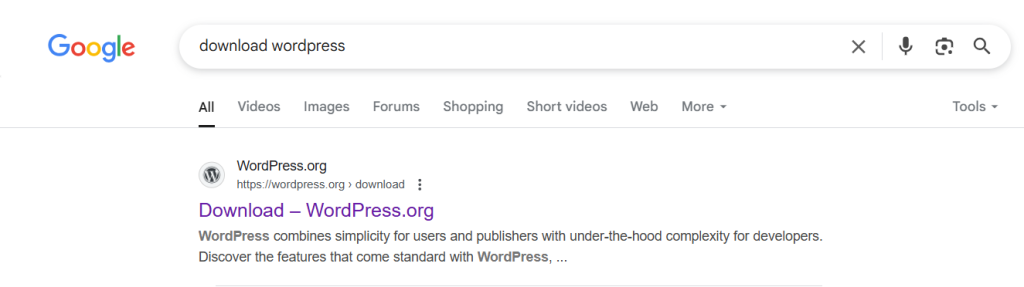
Initially, navigate to its official website WordPress.org and download the latest version (currently 6.8.1).
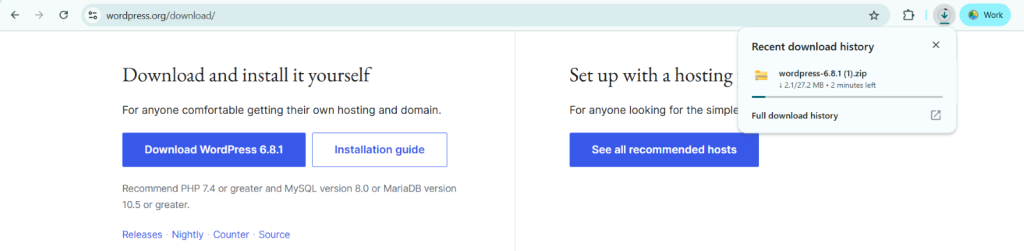
Once downloaded, you will get a Zip file. In the next step, we will see how to unzip and use it.
Step 2: Unzip and Place WordPress Files
Now unzip the WordPress file. You’ll get a folder named wordpress. Move this folder into your web server’s directory—usually something like htdocs (if you’re using XAMPP) or www (if you’re using WAMP), in our case it’s /web/html/dev/.
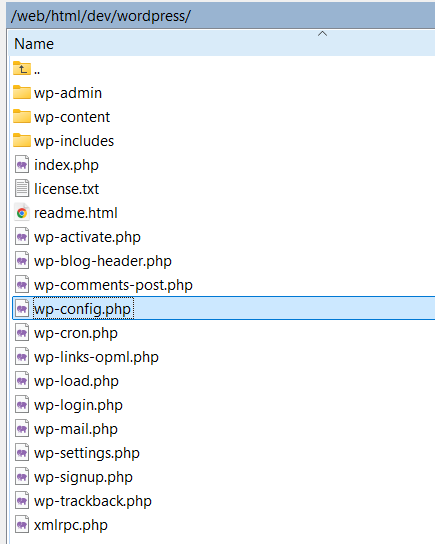
Make sure everything is inside the correct directory. You’re almost ready to go live locally!
Step 3: Enable Your Site
If you’re using a local server like XAMPP, launch Apache and MySQL from the XAMPP control panel.

Now, open your browser and go to:
localhost/wordpress/ in our case it’s
http://dev.outrightcrm.in/dev/wordpress/
If everything is placed right, you’ll see the WordPress installation guide.
Step 4: Create a New Database
Before running WordPress, you just need to set up a database.
- Open phpMyAdmin (you can find it at http://localhost/phpmyadmin).
In our case it is our IP address and then /mysql
- Click Databases.
- Name your database something simple like wordpress_db.
- Then click Create.

The database will store your site details, settings, and user information.
Step 5: Integrate WordPress to Your Database
For connecting your website to database, go back to your WordPress Installer (browser window) and follow below given steps:
- Select your preferred language
- Now fill your database details like this:
- Database Name: wordpress_db
This is the name you created in phpMyAdmin.
- Username: (default for XAMPP)
This is the default username if you are using the XAMPP server.
- Password: leave it blank
XAMPP doesn’t require a password by default.
- Database Host: localhost
Highlight that your database and website do not belong to the same computer.
- Table Prefix: wp_
Typically, leave this as it is or you can also customize it for security like mpwp_
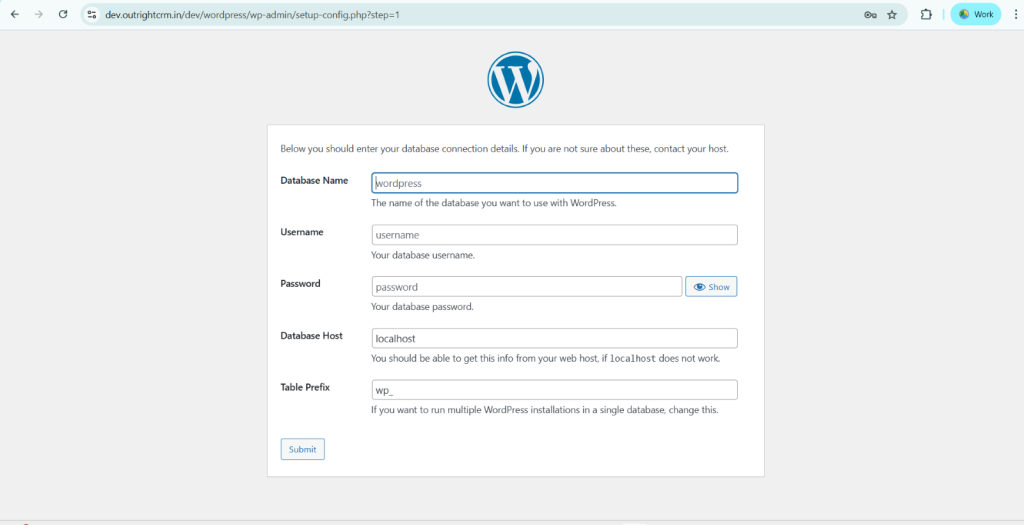
As shown in image, click submit and you would see a success message if everything detailed is filled correctly. Then press Run the installation to proceed further.
Step 6: Enter Your Site Details
Everything is almost done; you are just one step away from launching your site. Now you just need to fill in some important site details, like
- Title for your site: Simply name your blog or website you want.
- Username: Enter the admin username which you will use to log in.
- Password: Set a strong password or use the suggested one for securing your website.
- Email: Fill in the admin email for password recovery, in case you forget.
- Search Engine Visibility: You can skip this option, if your site is local or a test website.
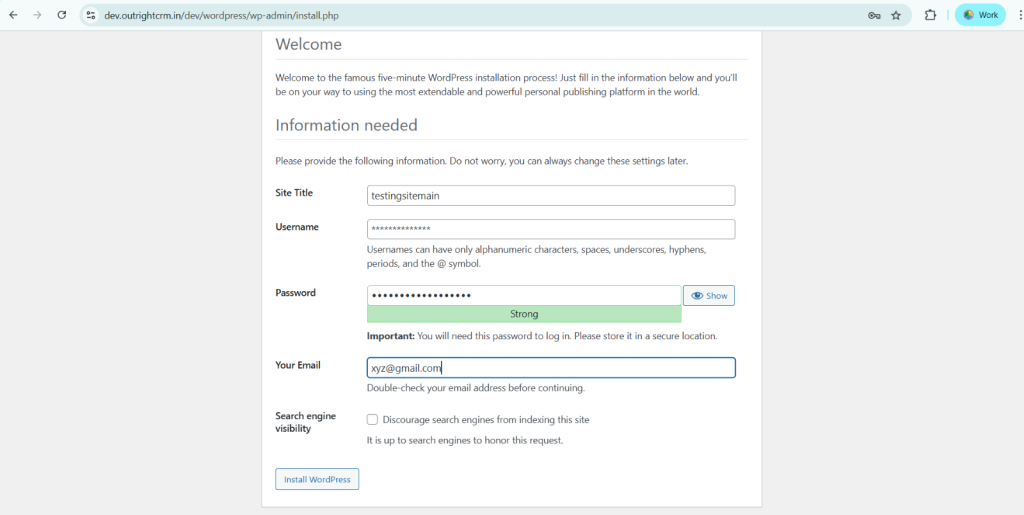
Click Install WordPress and wait a few seconds.
Step 7: Login to Your Dashboard
Boom! Your site is live. You’ll get a message saying the installation was successful. Click Login and enter the credentials you created.
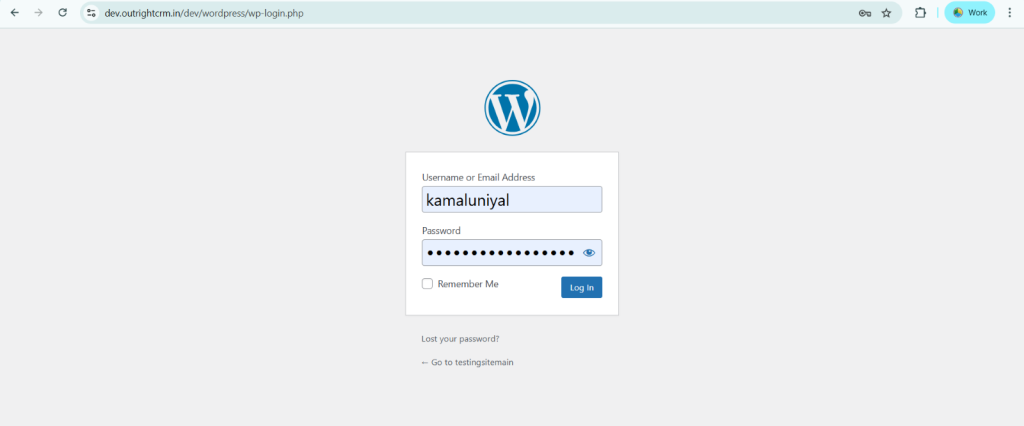
Once all done, you’ll land on the WordPress Dashboard—the control hub where you are going to build your site.
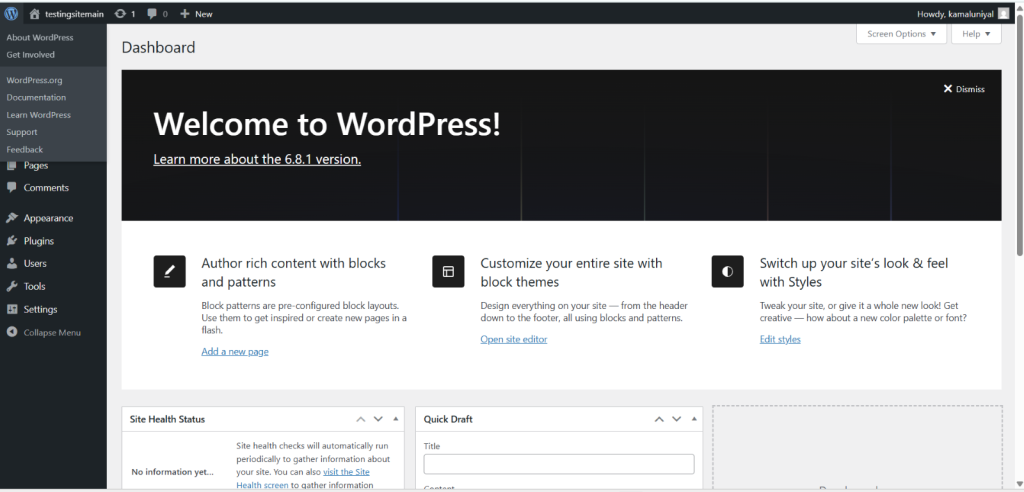
This is where you can download themes, add plugins, modify your site design, add plugins, and many more.
Conclusion
In 2026, setting up WordPress is not science fiction. Implementing the right steps and having a little patience can help you create your website from scratch in just 30 minutes.
Whether you’re building a blog, portfolio, or eCommerce store, this simple setup is your first milestone toward digital success.
Need help deciding on themes or plugins next? Stick around—more guides are on the way!
Pro Tips:
- Always choose strong passwords.
- Install a security plugin right after setup.
- Regularly back up your site (even local versions).
%201.png)

%201.png)

%201.png)