
 Share on media

Operating a WordPress website is one thing; understanding how people interact with your site is what really propels one forward. Without any insight into traffic patterns, content performance, and user behaviors, optimization of a site often remains a guessing game. That’s where WordPress analytics comes in. This guide will go over setting up analytics, tracking key metrics, and improving engagement, one step at a time, with screenshots included to make the process as straightforward as possible.
Why You Need WordPress Analytics
Analytics offers much more than simply tracking traffic. It can help you:
Know your audience-who your visitors are, where they come from, what devices they use, and what interests them.
- Analyze your content’s performance: Know which posts or pages are most popular.
- Optimize your marketing efforts by knowing which social media, advertisement, or email truly drives traffic.
- Boost Engagement: See what keeps people on your site, and what makes them leave.
- Boost conversions: Discover what action was taken; optimize for either signups or purchases.
With data-driven interventions, your WordPress website will grow based on evidence rather than assumptions.
Step 1: Create a Google Analytics Account
Google Analytics is the most popular tool for tracking website performance. Here’s how to start:
Go to Google Analytics

Click Start Measuring.
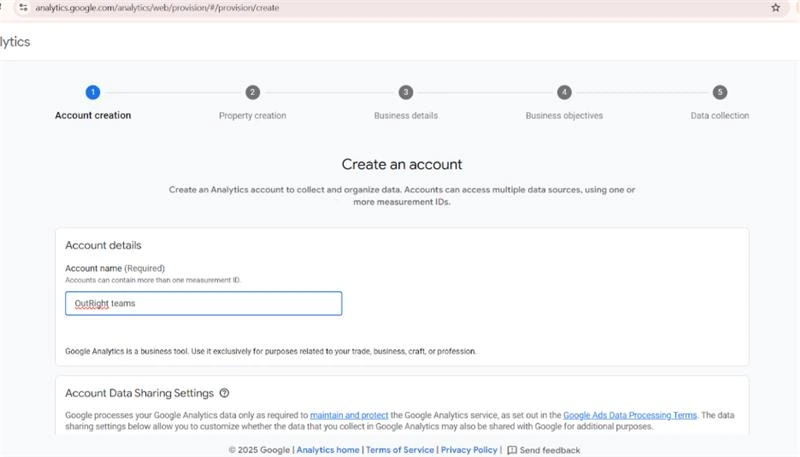
Enter your Account Name, select data sharing preferences, and click Next.
Google Analytics lets you measure several websites within a single account, making it easy if you manage more than one WordPress site.
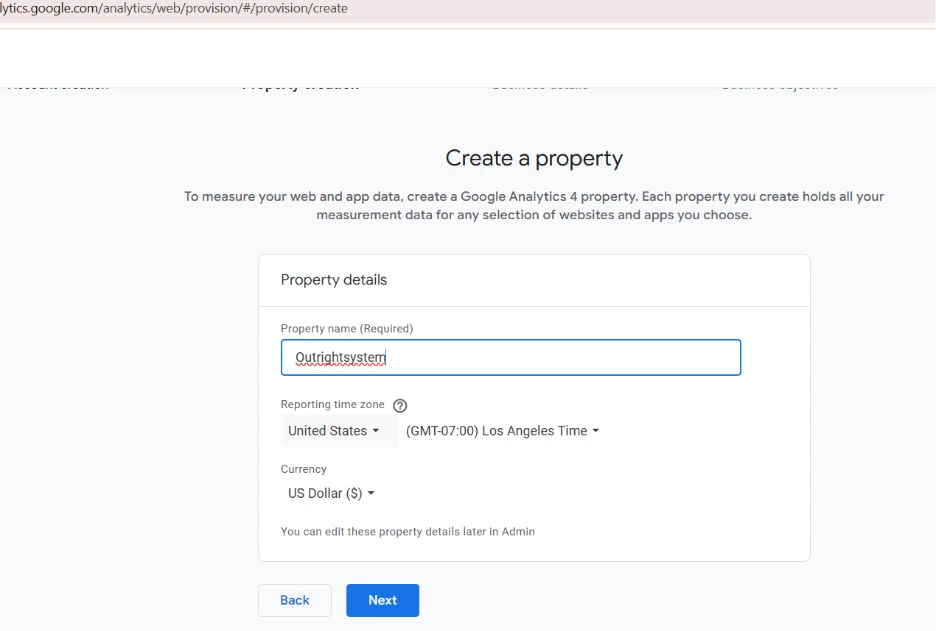
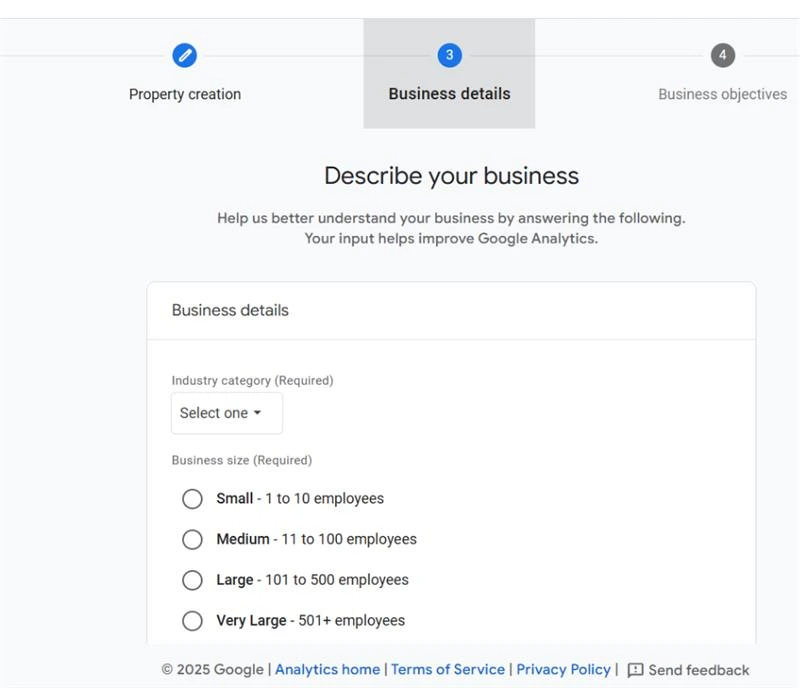
Step 2: Add Your WordPress Website—
After you create an account you will need to link your WordPress site:
Enter Website Name, URL, Industry Category, and Reporting Time Zone.
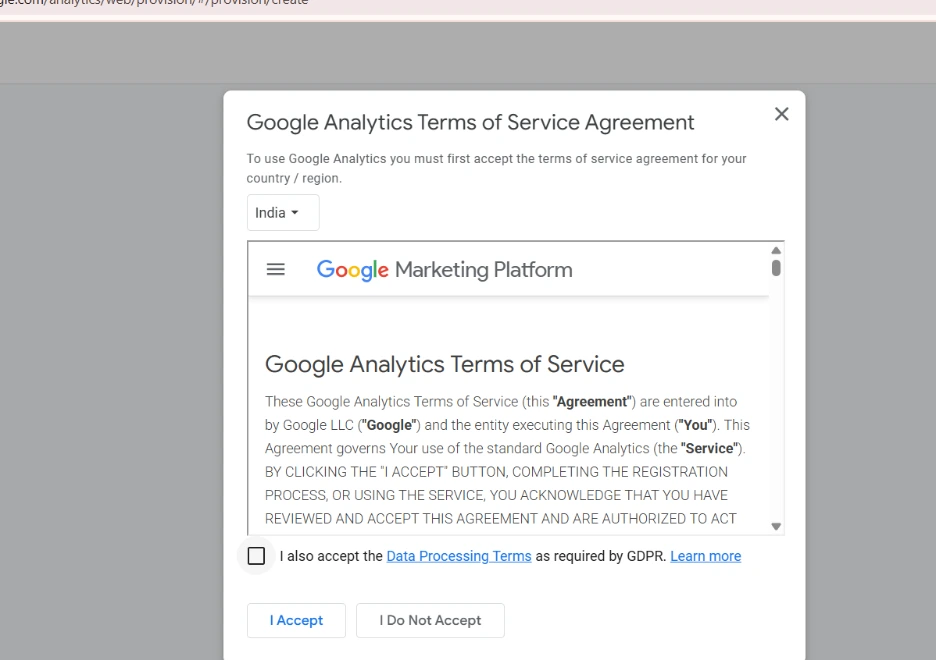
After reviewing the Terms of Service, click Accept.
You have identified what website Google Analytics will track by completing this step.
Step 3: Get the Tracking Code
The tracking code is what links your WordPress site to Google Analytics:
In Google Analytics, navigate to Admin > Data Streams > Web > Global Site Tag gtag.js
Copy the following tracking code:
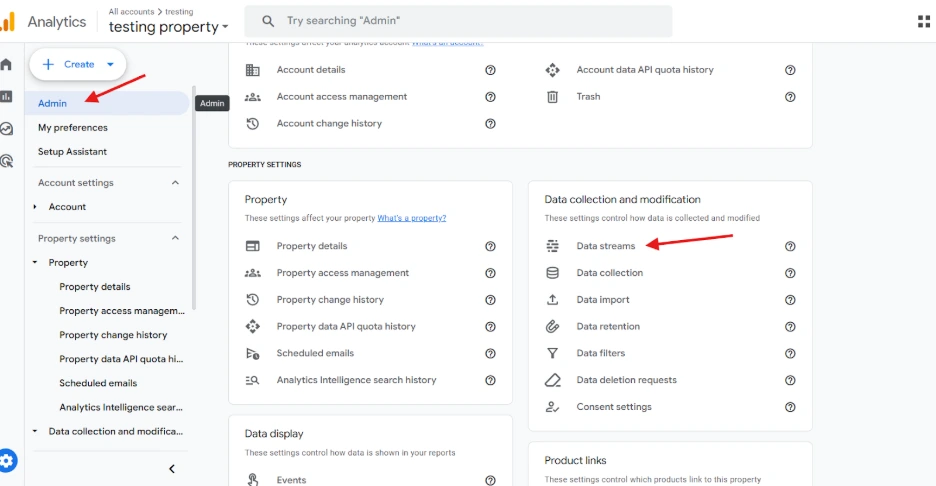

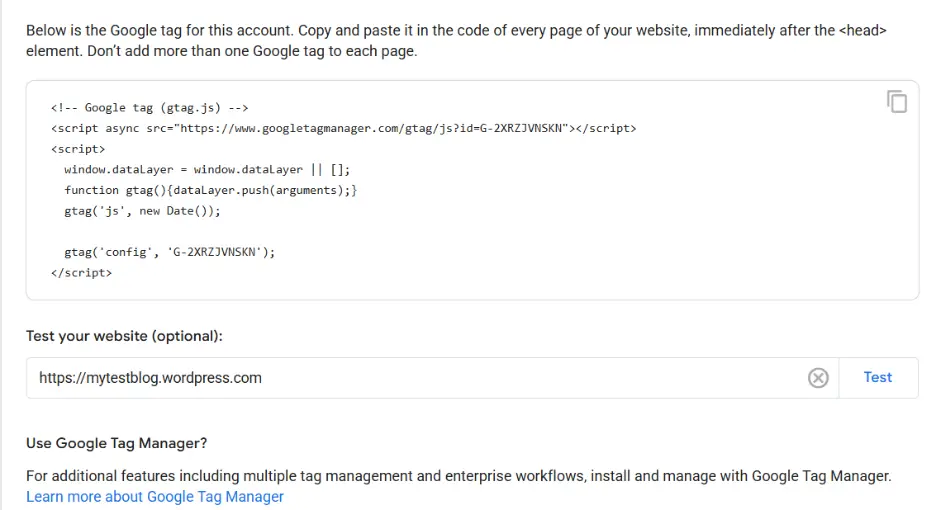
You’ll paste this snippet into WordPress so it can begin sending visitor data to Google Analytics.
Step 4: Add Tracking Code to WordPress
You can integrate Google Analytics using two major methods:
Option A: Using a Plugin (Recommended)
Plugins make configuration easy and save you from manually editing the code.
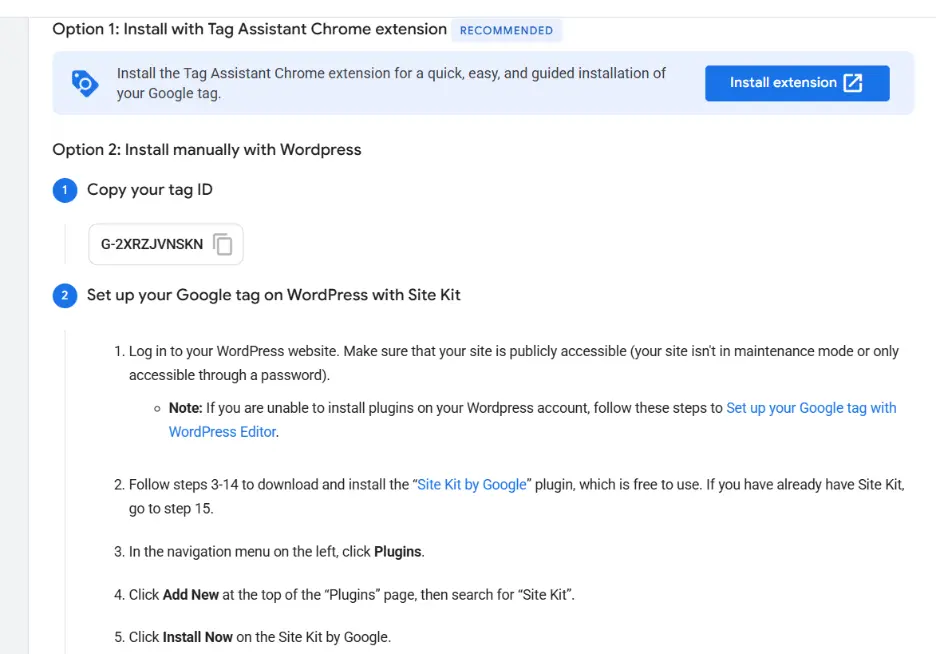
Install Site Kit by Google or Monster Insights.
Connect the plugin to your Google Analytics account.
This plugin automatically adds tracking code to WordPress.
Advantages: Automatic updates, simple dashboard in WordPress, and no coding required.
Option B: Manual Method
If you’d rather not worry about the plugin:
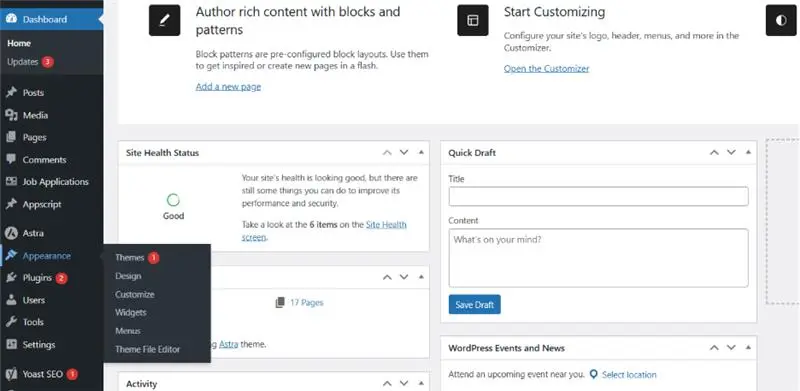
Go to Appearance > Theme Editor > header.php from your WordPress dashboard.
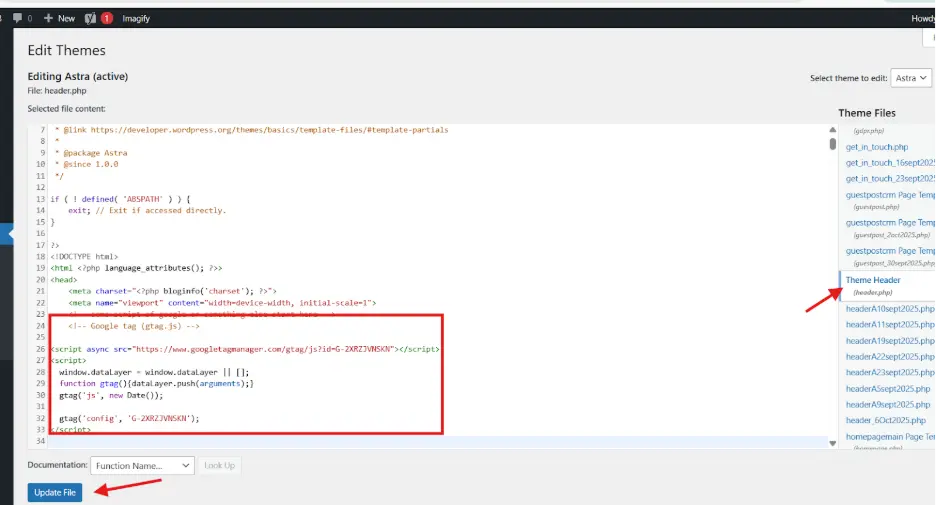
Paste the tracking code right above the tag.
Save changes.
Pro Tip: Make sure to back up your theme before changing your header.php so you don’t accidentally break your website.
Step 5: Test Your Tracking
Next, once you’ve inserted the tracking code, you will want to test if it is tracking correctly:
Go to your WordPress website.
Open Google Analytics > Real-Time.
Check to see your view in the real-time report.
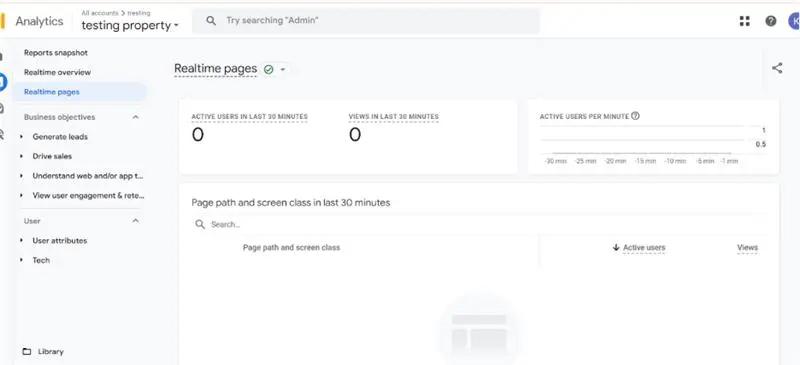
Assuming your visiting appears, congratulations! Analytics is now properly capturing your site.
Step 6: What to Track as Important Metrics
Tracking is only of value if you know what really matters. Here is what should be watched closely:
| Metric | What it Shows | Why It Matters |
| Page Views | Number of times a page was viewed | Identify popular content |
| Unique Visitors | Counts each visitor once | Measure audience size accurately |
| Bounce Rate | % of visitors leaving after one page | Understand content relevance |
| Average Session Duration | Time spent on site | Gauge engagement quality |
| Traffic Sources | How visitors find your site (search, social, direct) | Optimize marketing efforts |
| Conversion Rate | Visitors completing goals (form fills, purchases) | Measure success of CTAs |
Important Note: Focus on important metrics for your business. For example, page views and session duration would be important, engagement-related metrics for a blog or brand. Conversely, and as it often times is the case, conversion is the most important engagement metric for e-commerce brands.
Step 7. Analytics Lead to Action to Improve Engagement
Now that you’ve tracked some data, it’s time to take action so that you can try to improve engagement rates:
1: Internal Linking
Identify and link similar or related posts, pages, articles, etc throughout your content in order to keep your visitors on your site longer.
Example: If someone is reading a post about “WordPress SEO Tips” then you could link to “Best WordPress Plugins 2025 as an example.
2. Employ CTAs (Call-to-Actions)
- Include CTAs that encourage users to subscribe to newsletters, download something, or leave comments.
- Place CTAs where it appears it fits into your content.
3. Speed Up Page Load Time
- Utilize caching plugins (ex: WP Rocket or W3 Total Cache).
- Optimize images with a compression plugin like Smush or ShortPixel.
4. Enhance Readability
Divide text with headlines, bullet points, and images.
Use fonts and colors that are easy on the eyes.
5. Social Proof
Include testimonials, reviews, or user-submitted content.
Establishes credibility and encourages visitors to take action.
Step 8: Advanced Tracking Methods
To gain even more advanced insights:
1. Set Up Goals
Track for newsletter signups, downloads, or purchases.
Go to Admin > Goals > New Goal in Google Analytics.
2. Event Tracking
Track specific user actions like button clicks, video plays, or PDF downloads.
Can do this in Google Tag Manager.
3. Custom Dashboards
Create a dashboard to see an overview of key metrics.
Combine different reports to help with research.
4. Integrate Google Search Console
Track organic search performance and see which keywords are sending traffic.
Step 9. Leverage Analytics to Gain Insights that Refine Your Strategy
After you generate data:
Identify top-performing content: Repurpose or amplify high-traffic pieces of content.
Identify poorly performing pages and update or remove those that show low engagement.
Optimize traffic sources: Focus on those sources that will drive in the best results.
Improve the user experience by understanding user behavior through heat maps or session recordings.
Step 10: Continuously Measure and Improve
Analytics is not a one-time setup. Setup periodic checks:
- Weekly: Check the traffic, bounce rate, and pages.
- Monthly: Check the conversion rate and its source.
- Quarterly: Review the trends of your strategy and set new goals.
Consistency keeps your WordPress site or sites relevant and appealing to visitors.
Conclusion:
There is a direct correlation between tracking traffic and engagement with WordPress analytics and growing your site. Here’s how to accomplish this:
Install Google Analytics on WordPress.
Start tracking various metrics, such as page views, bounce rates, and where you are getting your traffic from.
Start to utilize the data you receive from these metrics to make changes to your content, increase engagement with readers, and ultimately drive conversions.
By using this approach, you will not only have a much better understanding of your audience, but you will also be able to make more informed decisions based on data-driven insights that can drive your success.
Quick Tips for WordPress Analytics:
1. Consider installing plugins such as Site Kit to simplify the installation process.
2. Track both traffic and engagement metrics.
3. Improve your content and user experience by using analytics.
4. Regularly review and adjust your strategies based on analytic insight.
%201.png)

%201.png)

%201.png)