 Share on media
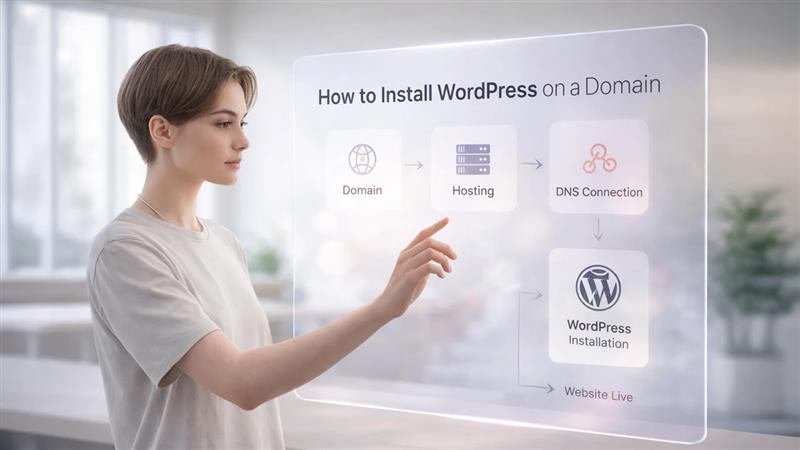
If you are a beginner, then setting up a website must have felt more complicated than it should have been. You come across terms like domain, hosting DNS, and WordPress installation, but it’s not clear how they connect. Many people think technical expertise is needed to install WordPress; however, it is not the case. In reality, installing WordPress is a structured process that becomes simple once your basics are clear.
The confusion usually comes from not knowing what connects to what. This step-by-step guide shows you exactly how to install WordPress on a domain using a clear and logical approach.
Requirements to Install WordPress on a Domain
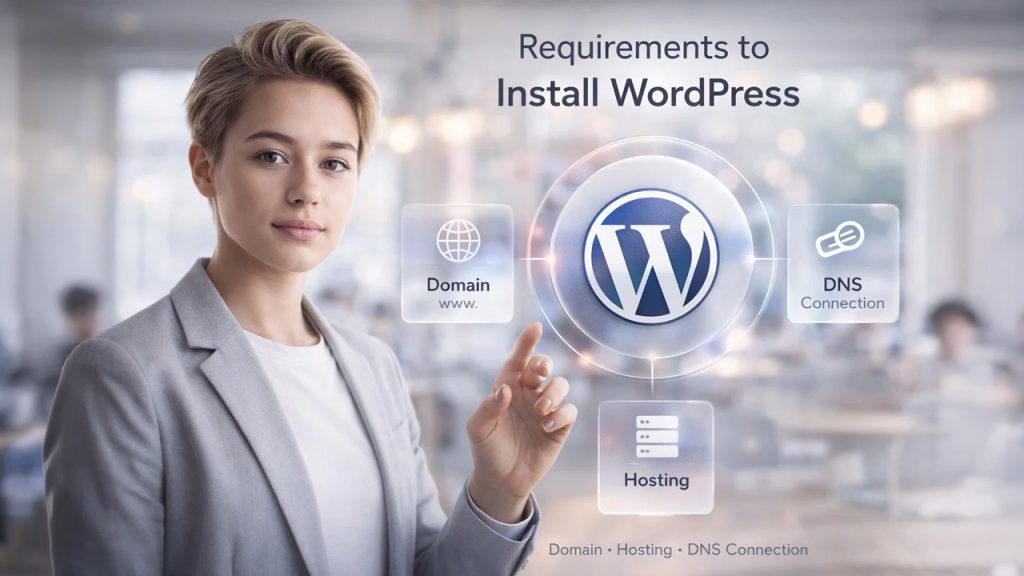
Before you start the installation, it is important to understand that WordPress doesn’t exist independently; it needs an environment to run. These three components form the foundation of your website.
Choose a Domain Name for WordPress
Your domain name is the identity of your website on the internet. It’s how users recognize your brand and find you online. That’s why it is important to choose the right domain because it affects credibility, memorability, including SEO. A clean and simple domain is easily trusted by users and makes them revisit your website.
Choose Web Hosting for WordPress
Hosting is where your website actually lives. It stores all your files, images, databases, and WordPress installation. Without hosting, your domain would be directionless as it has nowhere to point to. A good hosting provider (Hostinger and Bluehost) helps load your site quickly, keeps it secure and accessible to all users at all times.
Connect Domain to Hosting (DNS Setup)
Connecting domain to hosting is the most overlooked step by beginners. It is common to buy a domain and hosting separately, but they must be connected using DNS settings. This connection is important as it ensures that when someone enters your domain name, they are directed to the correct server where your website is hosted. If this link between domain and hosting is missing, your website simply won’t appear online.
Install WordPress on a Domain (Step-by-Step)
Let’s learn step-by-step how to install WordPress on a Domain. These steps are simple and easy to follow:
Step 1: Buy a Domain Name for WordPress
First, you need to purchase a domain name from a domain registrar like GoDaddy, Namecheap, or Google Domains.
- Choose a simple and memorable name
- Prefer a .com extension if available
- Complete the purchase and verify ownership via email
Step 2: Choose Web Hosting for WordPress
Next step is to purchase web hosting. Choose a reliable hosting provider such as Bluehost, Hostinger, SiteGround, or others. Now:
- Select your preferred plan (shared hosting is enough for beginners)
- Complete the signup
- Access your hosting dashboard or control panel (cPanel or custom panel)
Step 3: Connect Domain to Hosting (DNS Setup)
If your domain and hosting are from different providers, you must connect them. Below are the methods to do that:
Option 1: Using Nameservers (Recommended)
- Log in to your domain registrar account
- Find DNS or Nameserver settings
- Replace existing nameservers with your hosting provider’s nameservers
- Save changes
Option 2: Using A Record
- Go to DNS settings
- Find A record
- Point it to your hosting server’s IP address
DNS propagation may take up to 24 hours.
Step 4: Access Hosting Control Panel (cPanel)
Log in to your hosting account and open your control panel. Look for:
- WordPress Installer
- Softaculous
- Website Installer
Step 5: One-Click WordPress Installation
- Select WordPress installer
- Choose your domain
- Leave directory blank
- Enter site details
- Set admin credentials
- Click Install
Step 6: Configure WordPress Settings After Installation
- Visit /wp-admin
- Update site settings as per your needs
- Set permalink to “Post Name”
Step 7: Complete WordPress Installation
After the installation is complete, your website is live and accessible via your domain.
How to Connect Domain to WordPress (If Installed Separately)
Sometimes it happens that your WordPress is installed correctly, but the domain is not properly connected. This can lead to website not loading or showing a default page. This situation usually arises when:
- DNS settings are left incomplete
- Nameservers are not correct
- Changes haven’t fully propagated
Now what must be done to fix this issue? To resolve this, you need to make sure that your domain is pointing to the correct hosting server. Once the connection is successfully established, your WordPress site will automatically become accessible through your name.
Remember that DNS updates take time to reflect. Even when you did everything right, it may take several hours for the changes to reflect globally. That’s why patience during this stage is essential.
Post-Installation WordPress Setup Guide
Installing WordPress is only the first step. If you want to ensure that your website remains functional, secure, and optimized, then you need to complete a few essential actions.
- Set Permalink Structure: Clean URLs improve both user experience and SEO.
- Install SSL Certificate (HTTPS): This secures your website and builds trust with visitors.
- Choose a Theme: Your theme defines your website’s design and layout.
- Install Essential Plugins: Plugins improve performance and extend functionality.
- Delete Default Content: Remove sample posts to keep your site clean and professional.
- Update Basic Settings: Adjust time zone, site title, and language preferences.
Proactively taking these steps ensures that your website starts on a strong foundation. This saves time and effort on fixes later.
Common Mistakes When Installing WordPress & How to Fix Them
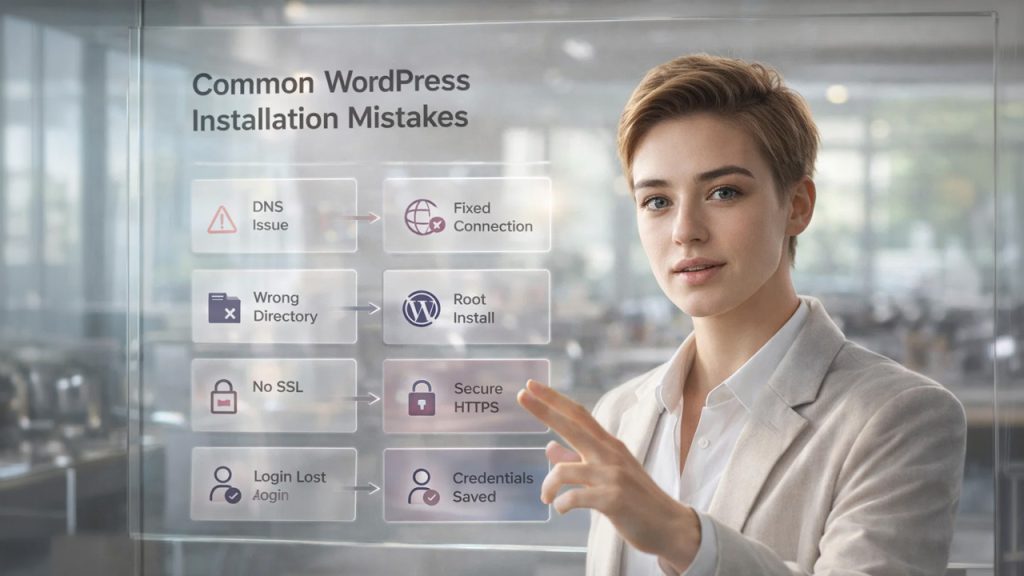
Beginners are most likely to make common errors while installing WordPress on a domain. Let’s see these what these common mistakes are and how to avoid them:
Incorrect Nameserver Settings (DNS Error)
One of the most common mistakes people make is entering incorrect nameservers or forgetting to update them entirely. This stops the domain from connecting to hosting, which makes the website inaccessible. Therefore, always copy nameservers exactly as provided by the hosting provider.
Installing WordPress in Wrong Directory
Sometimes, beginners unintentionally install WordPress inside a subfolder. This results in URLs like yourdomain.com/wp, which is not right for a main website. Hence, you must install WordPress in the root directory to ensure that your site loads directly from your domain.
Forgetting WordPress Login Details
Many people forget their login details which can further delay the process and create unnecessary complications. Therefore, always note your WordPress username and password securely after installation.
Not Installing SSL Certificate
If SSL is missing, your website will appear as “Not Secure” in browsers. This can erode users’ trust in your website and impact SEO. Enabling HTTPS immediately is essential for any modern website.
Ignoring DNS Propagation Delay
If the website doesn’t load instantly, many beginners assume that something is wrong or broken. But in many cases, it might be just a DNS propagation delay. Understanding this can help avoid unnecessary troubleshooting.
Comparison: One-Click vs Manual WordPress Installation
It is essential to understand the difference between one-click WordPress installation and manual setup so that you can choose the right installation methods.
| Method | Ease of Use | Best For |
| One-Click Installation | Very easy | Beginners |
| Manual Installation | Moderate | Advanced users |
| Control Level | Limited | Full control |
| Setup Time | 1-5 minutes | 15-30 minutes |
For beginners, One-Click WordPress Installation is the safest and fastest option. Manual installation is only necessary when advanced customization is required.
Final Thoughts: Install WordPress on a Domain
In the beginning, installing WordPress may seem overwhelming, but once you get the idea how domain, hosting, and WordPress work together. It is less about technical complexity and more about following a correct order with the right understanding.
Now that you have learnt how to install WordPress on a domain, you’re ready to take the first real step toward building your online presence. Start your website today, explore the platform, and turn your ideas into something visible, functional, and accessible to the world.
%201.png)

%201.png)

%201.png)