 Share on media
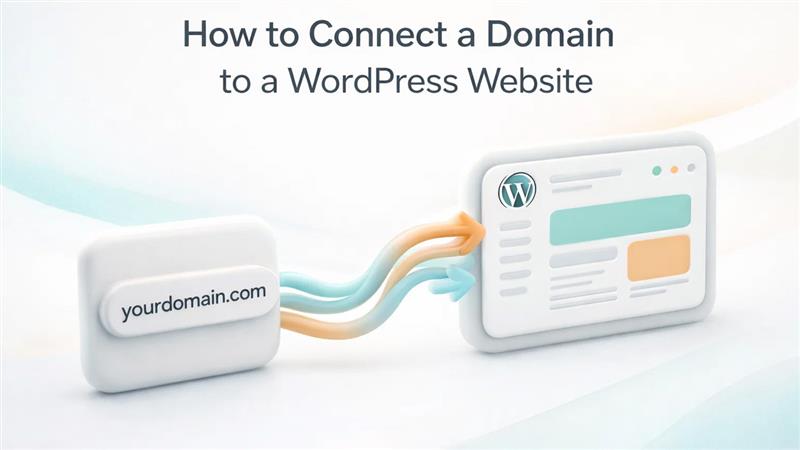
Want to learn how to connect a domain to a WordPress website? The blog offers you a deep dive into the meaning, benefits, and process of connecting a domain to a WordPress website.
A custom domain is a personalized and unique web address that represents your brand. A custom domain replaces the free and generic URL provided by WordPress. The process of connecting a custom domain to WordPress is among the most crucial steps in building brand credibility. A custom domain also aids in improving SEO visibility and improves brand recognition.
To know how to connect a domain to a WordPress site, you need to understand what it means to connect a domain to a WordPress website and what its benefits are.
What is Meant by Connecting a Domain to WordPress?
Connecting a domain to a WordPress website is the process of linking a custom domain name, like yourbusiness.com, which is purchased from a registrar to a WordPress hosting account. Linking a unique domain to a WordPress website allows visitors to access your site using a specific and professional address.
The process of linking the domain to the WordPress website includes updating the DNS records to point toward the WordPress site in the domain registrar. The main goal of connecting a domain to a WordPress website is to direct the visitors from the URL to the server that hosts your WordPress website.
Importance of Connecting a Domain to WordPress
Connecting a domain to a WordPress website is an essential step for a website, as it establishes a professional online presence, along with enhancing the brand credibility and enabling accessibility. Some of the key benefits of connecting a domain to WordPress are:
- Increases Brand Credibility: Use of a unique domain name helps in providing a professional appearance to your brand.
- Enhance Brand Recognition: A unique domain name also helps in building a memorable brand presence, along with helping to distinguish the site from its competitors.
- Increases Visibility: Connecting a domain server to WordPress hosting is considered a major step towards making your website more accessible and visible on the public internet.
- Higher SEO Ranking: Connecting a custom domain to a WordPress website helps the search engines to better understand the website and boost its SEO performance and ranking of the website.
- Email Branding: A connected domain to a WordPress website also helps in setting up a branded email address, which further enhances trustworthiness and professional communication.
How to Connect the Domain to WordPress?
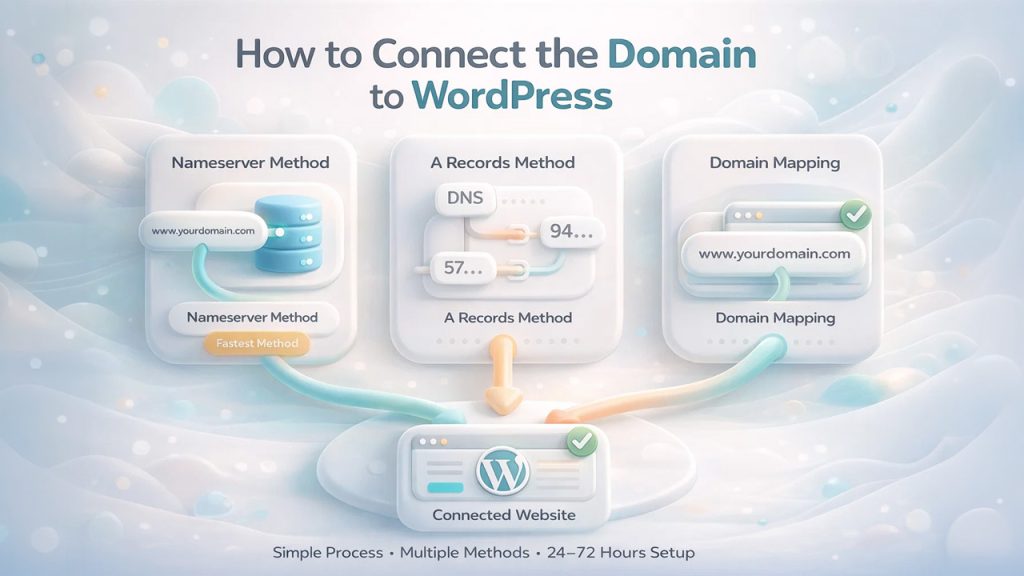
Connecting a custom domain to your WordPress website is a simple, easy-to-follow, and quick process. The process of connecting a domain includes three major methods and generally takes about 24 to 72 hours for the process to complete.
Here are a few main methods for connecting a domain to a WordPress website:
Method 1: Changing Nameserver
The method of changing the nameserver is the fastest and most recommended method of linking a domain to a WordPress website. The method connects a domain directly to WordPress. The process of changing the nameserver directs the DNS management to WordPress and requires 1 to 48 hours for global propagation.
Here are the steps to change a nameserver for WordPress:
- Step 1: Log in to your WordPress account and navigate to Upgrades, and click on Domains, to find your designated nameserver.
- Step 2: Log in to your domain registrar and navigate to DNS management.
- Step 3: Select Use custom nameservers and remove the existing ones. Enter the WordPress name servers.
- Step 4: Return to WordPress and click on “Verify Connection” to ensure the active settings.
Method 2: Use A Records
The A Records method of connecting a domain to a WordPress website includes updating the DNS settings of your domain registrar to point to WordPress IP addresses.
Here are the steps to connect a domain using A records:
- Step 1: Log in to your WordPress website and navigate to Upgrades > Domains. In Domains, select Add a domain and select “Use a domain I own“, then select “Map Your Domain” and enter your domain name.
- Step 2: Click on Connect your domain > Set up > Advanced setup > Start setup > I found the domain settings page to view the DNS records required in WordPress.
- Step 3: Log in to your domain registrar and navigate to the DNS management. In DNS management, delete existing A records from the root domain and create two A records that point to the following IP addresses: 192.0.78.24 and 192.0.78.25. Replace the CNAME record with your actual domain.
Method 3: Domain Mapping
The process of connecting a domain to a WordPress website through domain mapping is only available for the Premium+ user of WordPress. Domain mapping replaces the default URL and connects a custom domain to a site that is hosted in WordPress.com or a multisite network.
The process of linking a domain to a WordPress website via domain mapping includes the following steps:
- Step 1: Log in to your WordPress.com account and navigate to Dashboard. In the dashboard, click on Upgrades > Domains.
- Step 2: Select Add a domain > Use a domain I own > Map Your Domain > Connect.
- Step 3: Update the DNS settings of your registrar with the provided A records or CNAME.
- Step 4: Set the new domain as “Primary Domain” in the domain menu.
You can also connect a domain to a WordPress website using the Automated Setup method. WordPress.com can automatically configure the DNS for popular providers. You will be prompted to log in to your domain registrar to confirm the connection in the domain setup screen.
Key Considerations for Connecting the Domain to WordPress
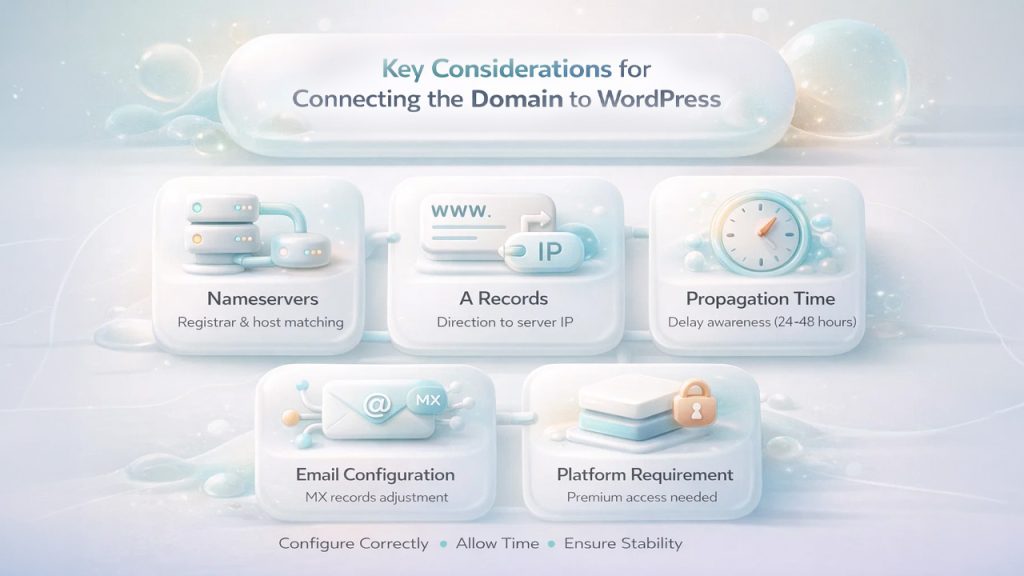
The process to link the domain to the WordPress website involves various key considerations, which include matching the nameservers from your host to your registrar, along with adding the domain to your WordPress account, ensuring the subdomain structure, and securing SSL.
- DNS Configuration:
- Nameservers- Add the default nameserver of your domain registrar with the nameservers provided by your WordPress host.
- A Records- Direct your domain’s name to the IP address of your site. For this, you need to add a Type A record (@), which points to your web host’s IP address.
- Propagation Time: It is important to consider that the changes in DNS settings are not instant, and typically take about 24 to 48 hours for the new domain to work globally.
- Email Configuration: Changing the nameserver may also disrupt the email services hosted on the same domain. To prevent this, you may need to manually re-add the MX records in your DNS settings.
- Platform Requirement: You need a paid plan to connect a custom domain if you are using WordPress.com.
Also Read: How to Migrate a WordPress Website
Conclusion
Connecting a domain to WordPress is considered the most important step in creating a credible brand image. Linking a custom domain to your preexisting subdomain of WordPress offers numerous benefits. A custom domain helps boost the brand trust among the visitors, along with improving the SEO ranking of the website, and offers full control over your brand. Using a subdomain offered by WordPress creates brand dilution, along with restricting the monetization of the website.
The process to connect a domain to WordPress involves three major methods: connecting a domain by changing the nameserver, by using A Records, and by domain mapping. Apart from these three methods, you can also link the domain to the WordPress website through the Automated Setup method, in which WordPress can automatically configure DNS for popular providers.
While connecting a domain to a WordPress server, it is also important to keep a few key considerations in mind, like changing the nameserver can also disrupt the email services hosted on the same domain, and the changes in DNS settings generally take about 24 to 48 hours to work globally.
%201.png)

%201.png)

%201.png)