
 Share on media

WordPress has made website creation remarkably accessible. With thousands of plugins available for nearly every function imaginable, most website owners instinctively install a plugin whenever they want to add a feature. Analytics tracking is no exception. There are many guides that recommend installing an analytics plugin to handle everything behind the scenes. This approach works, but it creates a hidden dependency.
Learning how to add Google Analytics code in WordPress without plugin offers a different perspective. With this method, you don’t have to rely on additional tools that slow down your site or introduce compatibility issues. This gives you direct control over tracking infrastructure of your website. Manual integration improves the performance of your website, keeps it light-weight, and helps you understand how the analytics system operates. In a digital environment where data drives decisions, that level of awareness becomes a strategic advantage rather than just a technical skill.
Why Google Analytics Still Matters in Modern Websites
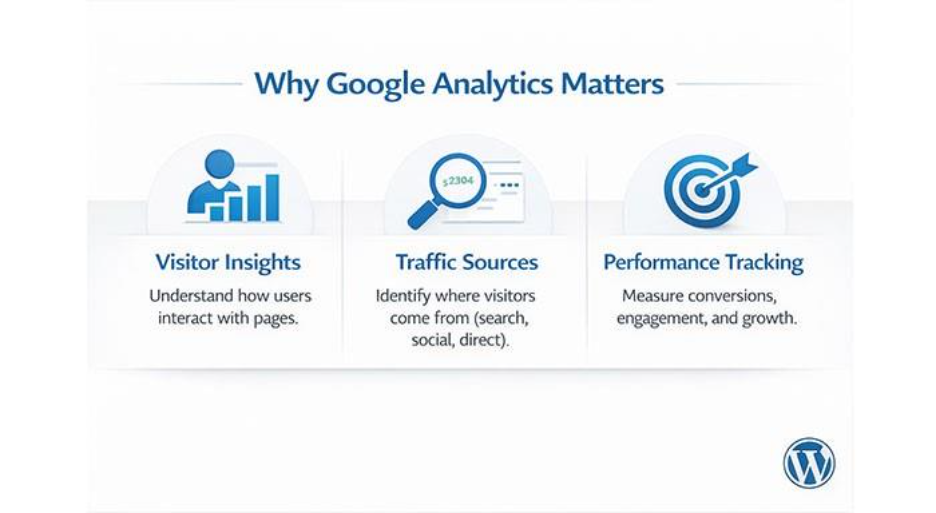
Google Analytics is an essential tool for understanding how visitors interact with a website. It shows which pages attract the most attention, how long users stay, and where they leave. It also reveals traffic sources such as search engines, social media, ads, or direct visits, helping businesses understand what drives traffic and where improvements are needed.
Additionally, analytics data helps evaluate content performance and refine marketing strategies. With Google Analytics 4 (GA4), businesses get event-based insights that track user actions across devices, enabling better WordPress SEO without plugin strategies, marketing optimization, and conversion tracking.
Requirements Before Adding Google Analytics Code to WordPress
- A Google Analytics Account: You must set up a free Google Analytics account to create tracking properties and generate tracking code.
- A Google Analytics 4 Property: Inside your analytics account, you must create a GA4 property for your website. This property is in charge of collecting and organizing data from your site.
- The Tracking ID or Global Site Tag: Google Analytics will provide you with a unique tracking code called the Global Site Tag. This script links your website to analytics dashboard.
- Access to Your WordPress Theme Files: To insert the analytics code manually, access your WordPress theme files through the Theme File Editor or hosting control panel.
- Basic Familiarity with WordPress Dashboard: You don’t need to be a coding expert but knowing how to navigate WordPress settings makes the whole setup a lot smoother.
Step-by-Step Guide to Add Google Analytics Code in WordPress Without a Plugin
To add analytics manually, you need to insert a small tracking script into your website’s header section. Once the code is placed correctly, Google Analytics automatically begins collecting data.
Step 1: Create a Google Analytics 4 (GA4) Property
Start by logging into your Google Analytics account. If you do not already have a property for your website, create one by entering your website name, URL, and industry category.
After the setup process, Google Analytics generates a tracking script associated with your property.
Step 2: Copy the Global Site Tag (GA4 Tracking Code)
Google Analytics provides a small piece of code called the Global Site Tag (gtag.js). This script connects your website to the analytics platform. You simply copy that code from your Google Analytics dashboard.
Step 3: Access WordPress Theme Files in the Dashboard
Next, log into your WordPress dashboard and navigate to:
Appearance → Theme File Editor
Locate the file header.php. This file controls the header section of your website and loads scripts that should run on every page.
Step 4: Insert the Google Analytics Code in header.php
Inside the header file, place the copied tracking code just before the closing <head> tag. This ensures the script loads early when a page begins rendering. After pasting the code, click Update File to save your changes.
Step 5: Confirm Google Analytics Installation
Once the code is added, your WordPress website will begin sending visitor data to Google Analytics automatically.
Keep in mind that analytics dashboards may take several minutes before showing new traffic activity.
Alternative Method: Add Google Analytics Code Using functions.php
There is another way to add Google Analytics code in WordPress without plugin. You can do so by using functions.php file. Through this method, you can insert scripts programmatically. You don’t have to modify the header file directly. This approach is preferred by many developers as it keeps theme files more organized and cleaner.
To implement this method, you add a small function that loads the analytics script when your website header section is generated. After implementation, the tracking code behaves exactly the same as when it is inserted into the header file. However, stick to header.php method if you are not familiar with editing theme functions. The header.php method is the easiest and safest option for beginners.
Manual Integration vs Plugin Integration in WordPress
| Feature | Manual Integration | Plugin Integration |
| Website Speed | Faster due to fewer scripts | May slow down site |
| Setup difficulty | Slightly technical | Beginner-friendly |
| Control Tracking | Full control | Limited customization |
| Plugin Dependency | None | Requires plugin |
| Maintenance | Minimal once installed | Requires updates |
| Flexibility | Highly customizable | Depends on plugin features |
Manual integration often appeals to users who prefer efficiency and control. Plugin integration may be more convenient for beginners, but it introduces additional layers that are not always necessary.
Common Mistakes When Adding Google Analytics Code in WordPress
Placing the Analytics Code in the Wrong Location: Make sure that tracking script appears inside the header section of your website. If you place it in the wrong file, then it will prevent analytics from collecting data.
Using an Outdated Google Analytics Tracking Script: Some tutorials still talk about older Universal Analytics code. Do not use them. For modern websites, it is recommended to use Google Analytics 4 tracking code.
Adding Google Analytics Script Multiple Times: If you had previously installed an analytics plugin, then the code might already exist on your website. Avoid duplicate scripts as they can distort data.
Forgetting to Save WordPress Theme Changes: Do not forget to save the changes after inserting the code into the header file. If you fail to do so, tracking script will not be active.
Ignoring WordPress Theme Updates: Updates may overwrite your changes if you directly edit parent theme file. To avoid this, use a child theme as it helps preserve custom modifications.
How to Check if Google Analytics Is Working on Your WordPress Site
After you add Google Analytics code in WordPress without plugin, the next step is verification. Tracking only becomes valuable when you know it is collecting data accurately. Here are simple ways to confirm everything is functioning correctly.
Check the Google Analytics Real-Time Report
The fastest way to confirm tracking is by opening the Real-Time Overview inside Google Analytics.
Steps:
- Open your Google Analytics dashboard
- Navigate to Reports → Real-Time
- Visit your website in a separate browser tab
- Refresh the page
If the installation is successful, your visit should appear almost instantly in the real-time report. This method confirms that the tracking script is loading and sending data correctly.
Inspect Your Website Page Source
Another quick verification method involves checking the page source of your website.
Steps:
- Open your website homepage
- Right-click anywhere on the page
- Select View Page Source
- Press Ctrl + F and search for your Measurement ID (G-XXXX)
If the code appears inside the <head> section, it confirms that the script was inserted successfully. However, this method only verifies presence, not functionality. That is why it should be combined with real-time testing.
Use Browser Developer Tools to Verify Tracking
Modern browsers include built-in developer tools that help identify whether scripts are loading correctly.
You can open Developer Tools → Network tab, then refresh the page and look for requests related to Google Analytics. Successful analytics scripts typically send requests to domains such as: google-analytics.com. If these requests appear in the network log, the tracking script is communicating with Google’s servers.
Use Google Tag Assistant to Detect Tracking Issues
Google provides a browser extension called Tag Assistant that helps diagnose tracking issues. This tool scans a webpage and shows whether Google tags are installed correctly. It also identifies problems such as:
- Duplicate tracking codes
- Incorrect placement
- Missing configuration
- Tracking conflicts
Using a Tag Assistant is one of the easiest ways to validate analytics setup without deep technical knowledge.
Monitor Traffic Data Over the Next Few Days
Finally, the most reliable confirmation comes from observing consistent traffic patterns over time. Within a few days, you should begin seeing:
- Page view numbers increasing
- Session counts appearing daily
- Traffic sources populating reports
If the data grows steadily, your manual tracking installation is working exactly as intended.
Why Experts Prefer Adding Google Analytics to WordPress Without Plugins
Manual plugin keeps your website lightweight and improves performance. Let’s look at the reasons why developers, experts and website owners prefer adding Google Analytics without plugins:
Improved Website Performance
Every plugin adds extra scripts, database queries, and processing tasks to your website. At first, individual plugins may appear lightweight, but multiple plugins together can slow down page loading times. Manually adding analytics code eliminates one more plugin from the stack.
Reduced Plugin Conflicts
WordPress plugins sometimes conflict with each other, particularly when they attempt to modify the same functions or scripts. Adding analytics manually ensures your tracking code remains stable regardless of plugin updates.
Greater Control Over Tracking Scripts
With manual integration, you can decide exactly where you want the analytics code on your website. This level of control makes sure that tracking is accurate while removing unnecessary script loading.
Cleaner WordPress Website Architecture
Fewer plugins mean a simpler and more streamlined website environment. This makes maintenance easier while reducing the chances of unexpected technical issues.
Lower Security Risks
Every plugin introduces potential vulnerability. Although most plugins are safe, poorly maintained plugins can expose websites to security risks. Removing unnecessary plugins strengthens overall website security.
Better Understanding of Website Infrastructure
When you manually add analytics code, you gain a clearer understanding of how tracking works. This knowledge becomes essential while facing troubleshooting issues or customizing tracking behavior.
Conclusion
Adding analytics to a WordPress website does not always require another plugin. By learning how to add Google Analytics code in WordPress without plugin, website owners can simplify their site architecture while maintaining complete control over data tracking. Manual integration reduces dependency on external tools and ensures that analytics scripts run efficiently without introducing unnecessary overhead.
In the long run, understanding how analytics works beneath the surface is just as valuable as the data itself. When website owners take direct ownership of their tracking infrastructure, they gain the flexibility to adapt, optimize, and evolve their digital strategy with greater confidence. From learning how to add meta keywords in WordPress without plugin to managing your entire site presence manually, each step toward reducing plugin dependency strengthens your website’s overall architecture and long-term performance.
Also Read
WordPress Plugin Generator: A Complete Guide to Building Plugins Faster
Best WordPress Plugin to Clean Up Old Themes (Step-By-Step Guide)
%201.png)

%201.png)

%201.png)